Tuesday, December 28, 2010

More to do


It's been awhile. But it's not like I haven't been busy.

I do want to race PHRF and that requires a certificate, which in this neck of the woods, requires a minimum of 19' and 400 lbs of ballast.....so I have been expanding the boat.


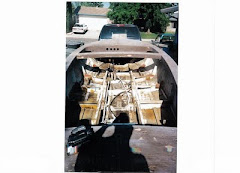
First, I have created the molds for the additional lead. 6 bricks at 40 lbs apiece should get me to the weight I need. I just hope the extra lead doesn't blow through the bottom of the boat!!


Second, I am working on a bolt on stern/suger scoop. I am building off a plan Chad of Knot Racing created. It is coming out pretty well.


Here it is w/ the first layer of glass.


Finally, I got out sailing again with the new sails. They still require some minor tweaks, but work brilliantly....sorry all, I don't have one picture....BIG mistake, but I will rectify that soon!!!


Happy Holidays!!!

Sunday, November 14, 2010

The numbers...

So here is a summary of the numbers:


1 garage


12 months

9 gallons of epoxy

$8500

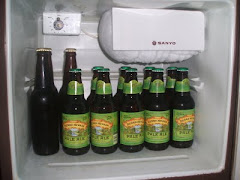
and the number we have all been waiting for.....it takes 528 beers to build an i550.

Actually, the beer-ah-meter was my time clock of sorts. It took somewhere around 500 hours to build the boat. I pretty much spent 40-50 hours a month working on it.

I spent $1500 on used Melges 20 sails. $1000 on hardware. $1500 on epoxy and resin if not a bit more. $300 on the trailer. $1000 between ply and the other building materials. Somehow, the West Marine wallet vacuum sucked the rest in $50 and $100 increments.

Lets hope we get that much fun out of the boat!!

Ben

Saturday, November 13, 2010

LAUNCH DAY!

The boat got wet today! I have named it Carbon Offset....because it is SOO green!!


Rigging up

Me and Molly on our maiden voyage


My favorite pic of the day, BOYS ROCK BOAT


A virgin touches the water


Another view

I grabbed some dacron sails while I get the Melges 20 sails altered. I am looking forward to a little more breeze next time out.

Huge thanks to John P who helped throughout this project. It was really nice to have him along for the first trip out today.

I am EXHAUSTED!! I will summarize the numbers in the next blog entry (dollars spent, hours spent etc.)

Finally, I can't thank Molly and the boys enough for putting up w/ my crazy project over the last year...you are SOOOO awesome!! Thanks

Good night!

Ben

Monday, October 25, 2010

Keel foil top plate

There have been issues w/ other boats losing the top plate of the keel foil. This plate keeps the keel from dropping out through the bottom of the boat.....in other words, a fairly important piece! One HUGE advantage to being a part of the second generation of boats is learning AHEAD of time what to avoid.

This is my plan:

Drill 3 x 1/4" holes down through the top of the foil


Cross drill 3 over sized holes where the first holes terminate


Flatten the top of the holes for plates and washers, bolt it all together and fill w/ epoxy and pray!


Here is the bulb atached (temporarily) to the bottom of the foil


So far so good!!!

Sunday, October 24, 2010

keel bulb

A very exciting and different part of the build: melting 150 lbs of lead and pouring it into the female molds.


The set-up, big burner, dutch oven, and molds VERY close by.


Safety gear....lead is really toxic, so respirator, safety glasses, and cold water at the ready.


Lead melted and ready for the big slide.


Sliding the oven off the burner and pouring. (Bend at the KNEES!!!)


Snap crackle and pop.
A little persuasion to help the foil section stay buried in the molten lead.


Lead in the molds.


Waste/shlag weighing in as planned.


Finished product.


Molly took video of the pour.
I was only able to get that posted on the i550 facebook site, and I can't get that link to load here. A quick search should pull it up for you though.
I have 150 lbs of lead between the two halves. I also have a little extra to fill in between the 2 halves when I bolt them together and 20 lbs in the keel foil. I won't be over the max, but pretty close to it!


Besides getting the keel assembled, I really only need to cut down the sails and I am ready to sail!!


YAHOOOOO!!!!!


Tuesday, October 19, 2010

Getting close

So I took a few weeks off. Work is busy, I was a bit burned out after putting in alot of time over the summer, and there is a real hesitation to FINISH as I dread finding out what is going to break first. But I'm over all that now and making the final push.


Rudder w/ tiller handle, extension and pintels/gudgeons all in place


Boom, gooseneck, mainsheet blocks and bridle done


Piles of halyards ready to be fished through the mast which has spreaders finished and halyard sheaves all cut in


The punch list:


run halyards and measure sails to be cut down


pour lead keel bulb and attach to keel


get keel into boat and beef up keel box


GO SAILING......hopefully only a few weeks away at this point!!!

Saturday, September 25, 2010

rudder, hardware and mast...


Have been working on a couple of things at once:


Rudder is shaped, glassed, beefed up around the gudgeon location and painted (first coat)


I have also been installing the Ronstan hardware. Here is some of the cockpit bling. I went w/ one access port and 2 speakers (thanks Chad for that idea).


Finally, I got the mast stood up fully rigged w/ the standing rigging. It looks like all of the rigging came out right. Time will tell as I tune everything, but at this point, it looks pretty good. Unfortunately, I didn't have the camera handy so pics will come later....
I am still short one boom.....need to work on that soon!!